





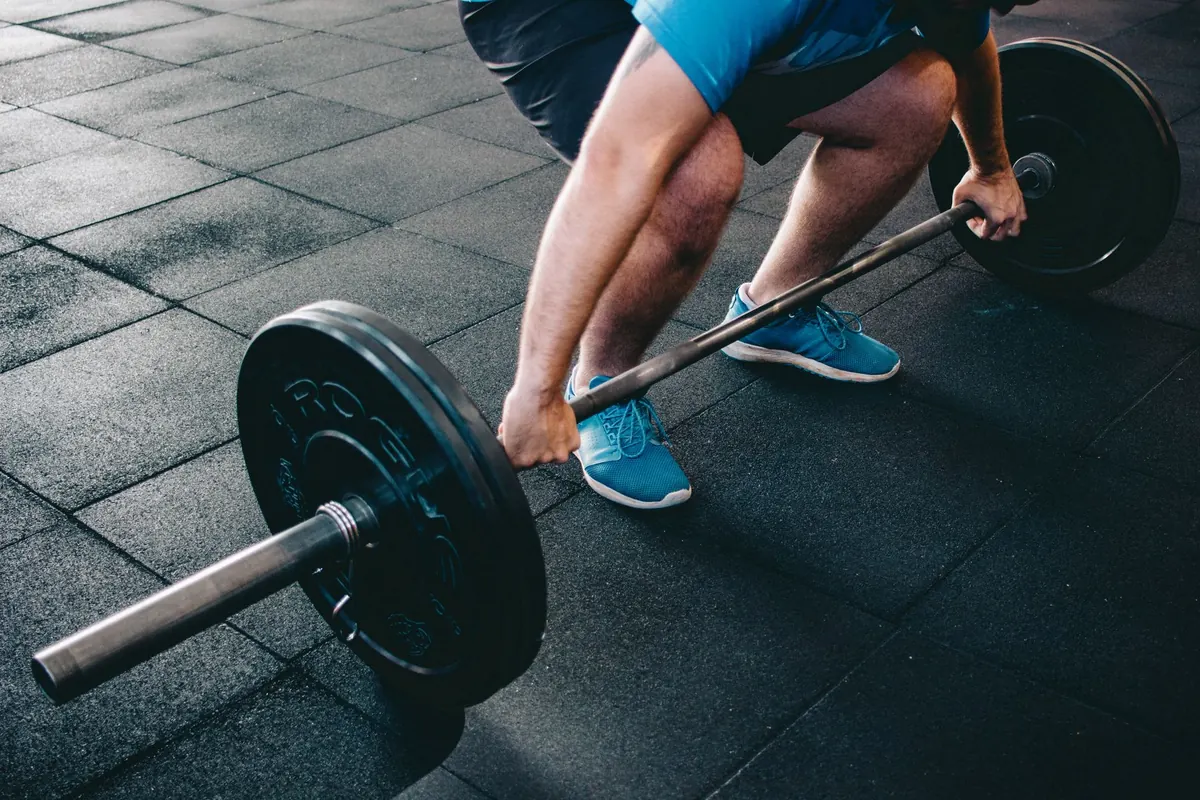
Few lifts are as honest as the deadlift. The bar leaves the floor or it doesn't, and there's no partial credit for effort. That honesty is also why the same three faults turn up in gyms everywhere, week after week: a lower back that rounds under load, hips that move out of sequence with the bar, and a grip that quits long before the legs and back are done. None of it is mysterious. Each problem has a cause you can find and a fix you can drill, usually without rewriting your program.
Start With a Position You Can Actually Hold
Troubleshooting usually starts too late. If the bar sits ahead of your midfoot, or your hips begin lower than your knees can support, the rep is compromised before it starts.
Set up the same way every time:
- Feet hip-width apart, toes forward or turned out slightly.
- Bar over the middle of the foot, roughly an inch from your shins.
- Hands just outside the legs, arms straight and long.
- Shins close to the bar — you'll feel it against your legs as you pull.
- Shoulders slightly in front of the bar, lats squeezed as if you're protecting your armpits.
Then test that position with a load you could handle for a comfortable set of five. If it collapses the moment the weight gets serious, you've been borrowing a start position your body can't hold. Fix the setup before you chase heavier numbers.
Rounding the Back: Treat the Cause, Not the Symptom
"Keep your back straight" is a cue, not a diagnosis. If your lower back rounds every time the bar passes your knees, something upstream is putting you there.
Where the rounding usually comes from
- The bar drifts forward. Every inch it travels away from your legs adds strain to the lower back.
- Hips set too low or too high. A squat-style start pushes the bar forward; hips that begin too high turn the pull into a stiff-leg deadlift.
- You pull with your back instead of your legs. The hips rise, the angle steepens, and the spine takes the load the quads should share.
- Mobility limits. Tight hamstrings, hips, or ankles can make a neutral spine feel impossible at the bottom. That's a flexibility project, not a cue problem.
Fixes that stick
Slow down the first third of the lift. Pause deadlifts — pull to just below the knee, hold for a two-count, then finish — teach you to hold position under tension instead of ripping the bar off the floor. Block pulls let you train the top portion at a slightly shorter range while you clean up your start.
Bracing matters just as much. Take a big breath into your belly before you touch the bar, hold it through the rep, and think about pushing the floor away rather than yanking the bar upward.
A slightly rounded upper back is common and rarely the problem. A lower back that flexes under load is the one to stop.
If rounding persists despite lighter loads and patient technique work, get a qualified coach or a physiotherapist to look at it. Pain during or after pulling isn't something to train through.
Hip Position: The Two Errors That Cost You the Most
Hips shoot up first
You set up, the hips rise, and the bar doesn't. The knees straighten, the back angle steepens, and a lift you intended as a deadlift becomes a stiff-leg pull with extra spinal load. It usually means the bar is too far forward or the quads were never really invited to the party.
Fix: pull the slack out of the bar before you commit. Take your grip, set your back, and pull until you feel tension run through your arms and lats — without the plates leaving the floor. From there, think of the first few inches as a leg press: knees and hips extend together and the bar stays glued to your shins.
Hips start too low
This is a polite way of squatting the bar. You sit down, the bar drifts forward, and then the hips rise anyway — so you've added range of motion and gained nothing. If you can't hold your hips where you start them, they're too low.
Fix: Romanian deadlifts and unloaded hip hinges teach the difference between squatting and hinging. Set your hips where they naturally land when your shins touch the bar and your shoulders sit just ahead of it. That's your start. Not lower, not higher.
Grip Problems That Undo Good Pulls
Your grip is the first link in the chain. When it fails, nothing else about the rep matters.
- Double overhand first. Use it for warm-ups and as much working volume as you can manage. It builds the hand strength you'll want later.
- Hook grip for heavier singles. Thumb trapped under the fingers, bar sitting across the palm. It feels unpleasant for the first few weeks and then it stops being a topic of conversation.
- Mixed grip with care. An underhand side can help on heavy sets, but keep that arm locked straight and watch that it doesn't rotate your torso. Switch which hand goes underhand from session to session so you don't always lean the same way.
- Straps are a tool, not a cheat. Fine for high-volume sets where the goal is back and leg work. Less useful if grip strength is itself a goal.
- Chalk, and dry hands. A slippery bar rolls, and a rolling bar pulls your shoulders out of position.
- Grip firmly, don't strangle it. Over-squeezing drains forearm tension into the rest of your setup and makes it harder to set your lats.
One more grip-adjacent habit: keep the bar dragging up your legs. When the hands start to slip, lifters often push the bar away from the body without realizing it, which loads the lower back and makes the pull harder than it needs to be.
A Quick Self-Check Before Every Heavy Set
- Bar over midfoot, shins close to it.
- Big breath, ribs down, brace hard.
- Pull the slack out until the bar is tight.
- Push the floor away — chest and hips rise together.
- Bar stays against the legs the whole way up.
- Finish tall with hips and knees locked, then lower under control.
Practice One Fix at a Time
Film a set from the side and watch it back at normal speed, then slowly. Pick one fault per session and leave the rest alone; trying to correct three things at once usually produces a lifter who is thinking instead of pulling. For a few weeks, positions matter more than loading. Five clean triples at a weight you can control will do more for your deadlift than one ugly max.
If something hurts in a sharp, joint-specific way, stop and have it assessed by a medical professional rather than pushing through it. For everything else, the process is dull and effective: set up properly, brace, push the floor, keep the bar close, and repeat. Fix the boring parts and the numbers tend to follow.
Photo: Victor Freitas / Pexels